[Editor’s Note: This is the first in a series of articles by Dick and his collaborators on the construction of each major component of the Concordia. There’s much more to come. Watch this space!]
The man-hours required to build a prototype sailplane with the level of complexity of Concordia is staggering. Like most large prototype aircraft or sailplane projects, Concordia is currently significantly behind schedule and over cost. Someone once said, “Building a complex aircraft is like eating an elephant, you have to eat it a spoonful at a time,” and so is the case with Concordia. We are currently in the sixth year of building and are beginning to see the light at the end of the tunnel with most of the major fuselage and wing components nearing structural completion. In the next few paragraphs we will take you through some of the significant milestones in the Concordia building process up to this point in time. As the building phase continues, we will update progress with additional pictures accompanied by brief explanations.
The build phase of Concordia was initiated in the winter of 2004 when Butler and Waibel visited the Schleicher factory and negotiated the build of the cockpit area of Concordia. In the design phase of the project the cockpit area of the ASG 29 sailplane had been selected as the Concordia forward fuselage shape. The ASW27 and follow on ASG29 forward fuselage area was not only proven aerodynamically, but also offered the latest in Schleicher control systems, which Waibel and Greiner had designed. Waibel developed an entirely new lamination scheme for the cockpit area to accommodate the increased structural loads that would be experienced by Concordia. The new lamination scheme would also incorporate all the cockpit safety criteria that Waibel had pioneered in sailplane design over the past two decades. Below is a series of photos showing the basic steps in building the Concordia fuselage with notations accompanying each picture.
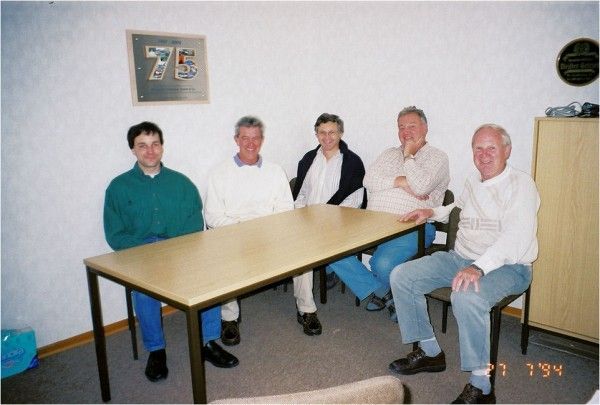
This photo was taken of a portion of the Schleicher team in 2004 at the beginning of the program to build the fuselage cockpit section.
The Fuselage
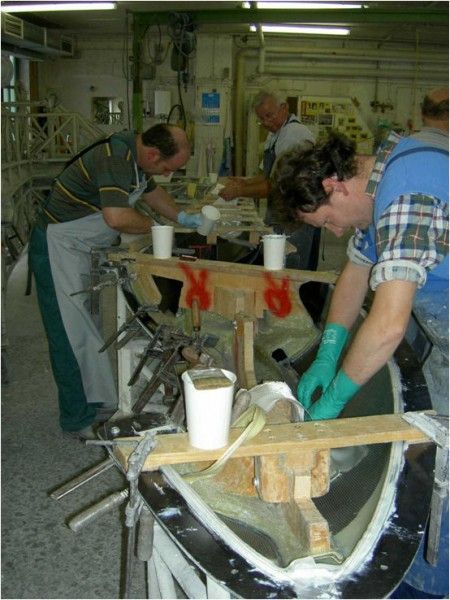
This photo shows Schleicher craftsmen building the Concordia forward fuselage in the ASG29 fuselage mold.
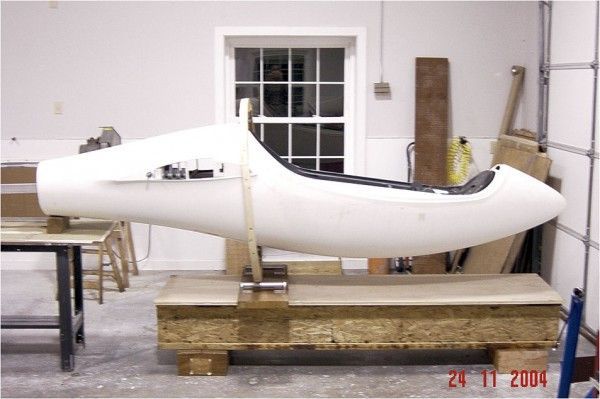
The forward fuselage was shipped to the USA in the winter of 2004 and is shown here in Butler’s shop in Tennessee.
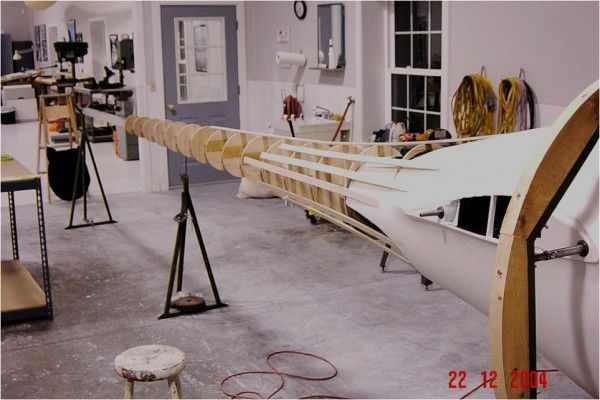
The fuselage was attached to an aluminum tube acting as the strong back to which bulkheads representing the various cross sections of the fuselage were attached.
The bulkheads were covered with 6 mm thick balsa strips that would act as the core material for the carbon sandwich skin. Balsa was used as the core material for achieving the desired fuselage aerodynamic shape and for providing a structural benefit not possible with a foam core. A significant amount of the fuselage bending is carried by the balsa core, thereby reducing the weight of carbon required for meeting overall design loads. Incorporating balsa as a core material confers a high strength to weight ratio to the total system, but is not practical in a production ship due to the increase in man-hours required for shaping and fitting. Because weight control is so critical for the small wing area of Concordia, balsa would have been the core material of choice even if a mold had existed for building the fuselage.
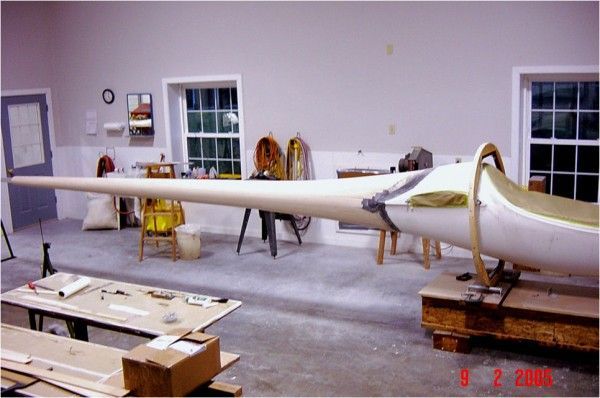
This photo shows the fuselage with the outer layer of the carbon balsa sandwich. A mold for the vertical stabilizer can be seen in the foreground.
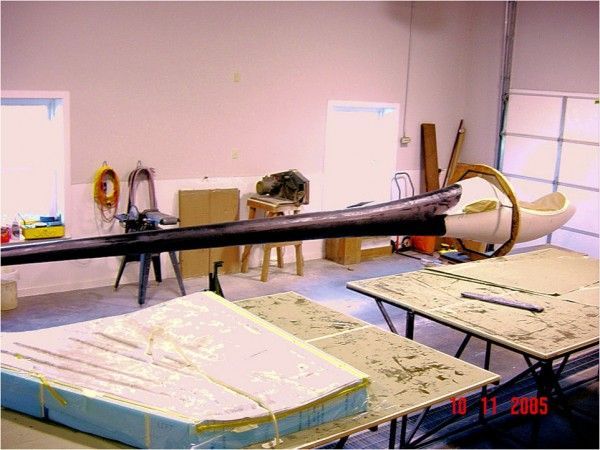
Balsa varies widely in density and accordingly in strength and stiffness. Even though the balsa ordered for Concordia was specified to lie in a restricted density range, it had to be divided further by the builders into rather narrow density ranges, which were then incorporated into specific areas of the structure. For example, heavy balsa was concentrated in the inboard wing skins and especially near the spar, whereas very light density balsa will be used as a core for flap and aileron sandwich structures.
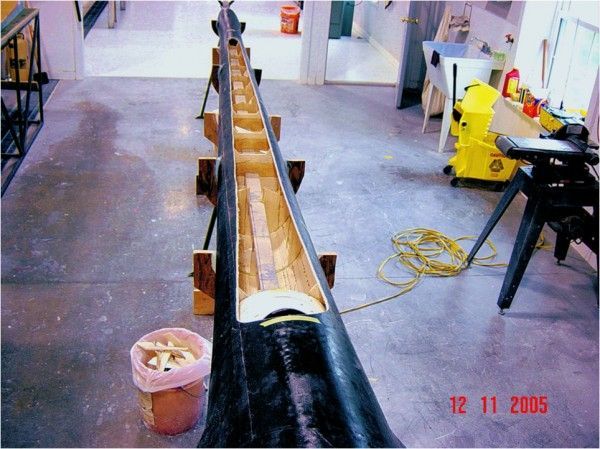
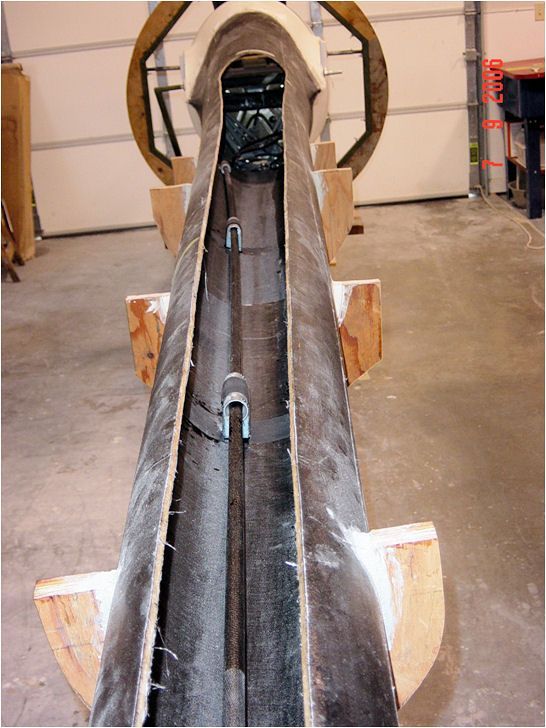
The fuselage cut out is shown before removing the strong aluminum back and associated balsa bulkheads. An inner layer of carbon will now be applied to the fuselage forming the carbon balsa sandwich. The cut out is necessary for not only applying the carbon inner sandwich layer but also to permit installation of control systems.
When this photo was taken, the fuselage inner skin had been applied and the elevator push rod installation was in progress. Rudder cables, the actuation cable for tail water ballast tank, instrumentation pneumatic tubes, etc. still remain to be installed.
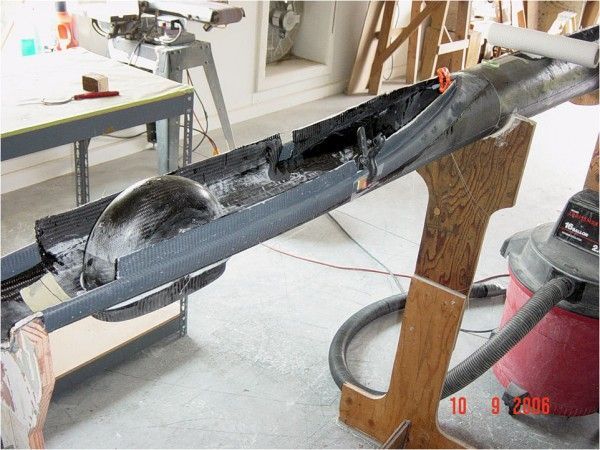
In this photo, a section of fuselage is being prepared for the installation of the vertical stabilizer. The tailwheel housing can also be seen.
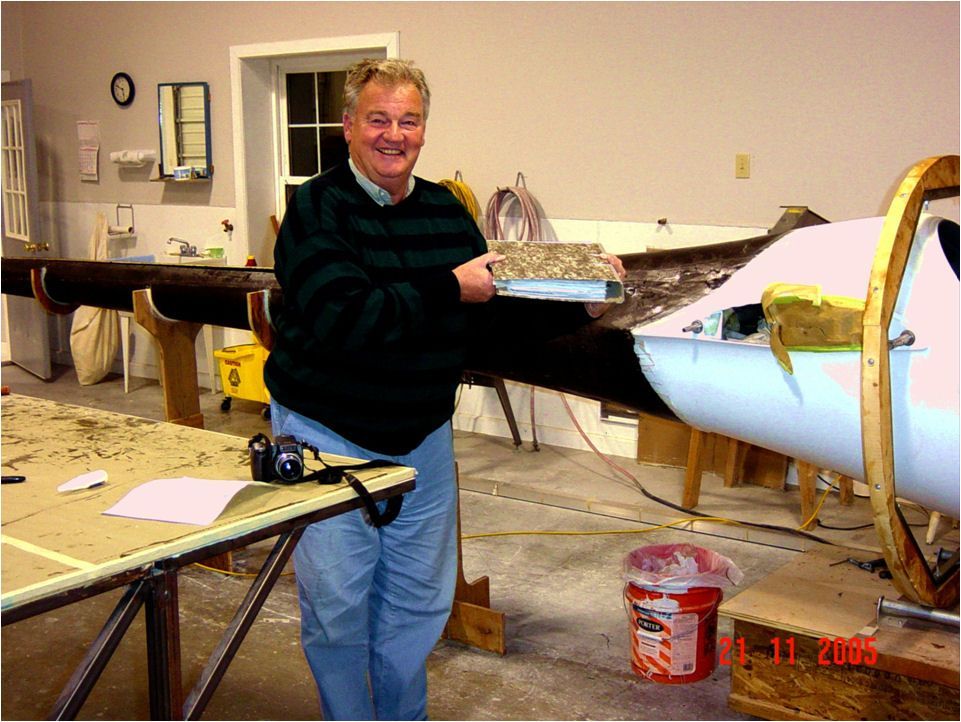
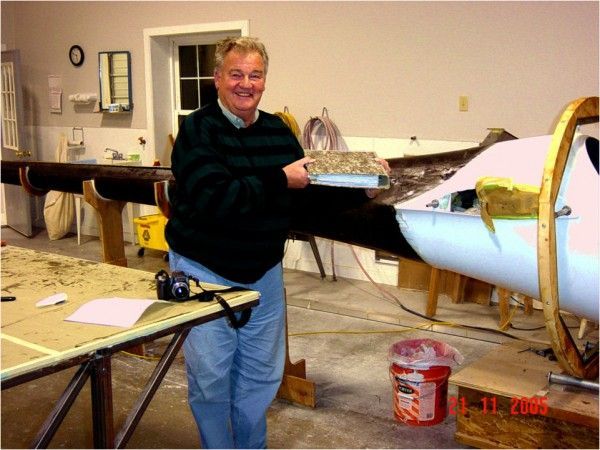
Gerhard Waibel proudly showing progress on the fuselage with all design calculations to date. The design notebook that Gerhard is holding will grow to many times this size as the building program goes forward.
Wow – I am totally awed by the dedication to soaring perfection demonstrated by DB and his team. Thank you for sharing the story and the photos!
The tailwheel housing looks *huge* – I know it can't be very large, but there's no scale in this photo, and my mind keeps trying to tell me it is about 10" in diameter 😉
Frank (TA)
haha frank I thought that was for the main gear until i read the caption!
Frank, the tail wheel is a 210-65 (8 inches in dia) which is standard for most of the open class sailplanes. Loads on the tailwheel are directly proportional to the length of the tail boom per CS-22 and can become rather large with a hard landing. Open class sailplanes with a long tail boom like Concordia require such a mighty tail wheel to handle these loads. dick
Dick,
Thanks for the prompt reply, and for letting me regain a sense of sanity ;-). Just one more on the infinite list of things to worry about when designing and constructing such an awesome flying machine. I hope they have room for this thing in the Smithsonian! 😉
Frank(TA)
very interesting process there!
Brad
Fascinating Read
How is the hole in the fuselage closed up after the inner skin and controls are installed.??
Thanks